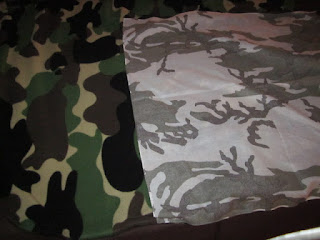
But at $6-8 a pop, these little bags can start costing a pretty penny. All it is is fleece sewn into a square with boxed corners. After watching a tutorial video on YouTube, I knew making a cage bag would be a snap (sort of).
First, I started with a bandana. It is a large size, and I knew it would hold my family of 4 gliders with room to spare. I placed the bandana on top of a large piece of fleece and cut around it to have 2 equal cloth sizes.
Next, I folded over the bandana and pinned along each of its sides.
Then is was time to send it through the machine on both sides.
Then I had to box the corner. To do that, I turned the bandana on an angle and sewed it about 1 inch from the bottom.
After sewing the corner, I cut off the excess from the bottom of the bag to box the corners.
Then I had to sew up the sides and make box corners on the fleece cloth.
Next, cut out a couple of small strips from the leftover fleece to make loops for hanging the bag in the cage.
Then I turned the newly sewn fleece inside out. Place the sewn bandana right-side out inside the fleece, lining up the seams. Fold the strips to make a loop and place in between the bandana and the fleece at the seams.
Sew around the top of the fleece and bandana to attach together, leaving a 1.5-inch gap between the beginning stitch and ending stitch.
Turn the bag inside out by pulling the fleece, bandana and loops through the gap. Then stitch up the gap using a hand stitch or machine stitch (I opted for the machine). Voila, the cage bag is complete.
Although I don't have a picture with a glider inside of it, my Gizzy was quick to examine the bag once it was secure in the cage.


Looks easy to do – that is, if you know how to sew well. I hope you took a picture with your Gizzy in it. By the way, that’s a cute name for a sugar glider. Will we ever get to meet your little furry pet? Priscilla @ ThePetGlider.com
ReplyDelete