Today's refashion started with this dress.
As you can see, it's a little big now. The ragged bottom of the dress happened when I created a toy for the pups (see this post).
I wanted to make a shirt with an asymmetrical hemline. It needed to be short in front and longer in the back. So, I did a big cut on an angle.
Next, I pinned up each side of the dress to take it in a couple of inches.
Then, I sent each side of the dress through the machine. Since the fabric is stretch, I opted for a zigzag stitch.
Next, I trimmed off the excess fabric.
Then it was time to hem the bottom of my new shirt. I folded over the hem by about a half inch and pinned it.
I sent it through the machine to secure my new hem.
Finally, after a quick press with the iron, my new shirt was ready. Not too shabby (or raggy) huh?
Showing posts with label dress. Show all posts
Saturday, February 23, 2013
Saturday, January 26, 2013
Refashion: 2 Cowls to 1 Dress
I'm so excited. I finally got my sewing area cleaned up and my new sewing machine set up for my refashions. And I had a great idea for my first (sewing machine) refashion. First, take a look at my brand new toy.
Isn't it pretty? It's got so many cool buttons. I can't wait to get to know all of them. I actually had to read the instruction manual to make sure I understood it before I launched into my project. It's a bit different from my old machine, but it didn't take us long to become good friends. I got it threaded and practiced on one of Cliff's shirts that I needed to stitch. It works great, and I was so happy to begin my refashion. So, here is where my project began.
Apparently, I have a thing for shirts with cowl necks. But because of my weight loss (yea!), these shirts are now too big for me. It's funny because I actually just wore the purple shirt this week. But when I noticed it kept hanging over my shoulder, I knew it was time to retire it. But instead of donating it, I decided it would make for a beautiful refashion.
First, I started with the black shirt. I needed to sew through the shoulders a little so it wouldn't hang on me so much. I took in each shoulder by 2 inches.
Then I made it permanent with a straight stitch through my machine.
Next, I had to take in the sides. I pinned each side in by 2 inches.
Then, once again, I sent it through the machine. Since this material is quite stretchy, I opted to do a zigzag stitch to allow for a little give.
After I got the shoulders and sides taken in, I had to trim off all the excess.
Next, it was time to take care of the pink cowl shirt. My plan was to turn this whole ensemble into a dress, so the pink cowl shirt was going to become the bottom of the dress. First, I chopped off the top part of the shirt from the bottom, right under the sleeves.
Then I placed the raw cut edge of the pink shirt against the finished edge of the black shirt with the inside of each shirt touching and pinned them together.
Next, I sewed these two pieces together to create one long dress. Again, the fabric is stretchy, so I once again used a zigzag stitch for it.
After I connected the bottom of the dress to the top of the dress, I got out my trusty (rarely used) iron to press all the newly sewn seams.
I tried on the dress, and I wasn't completely happy with the way it was hanging. I didn't want to put on a sash because I wasn't sure that would give me the effect I sought. So, I grabbed my dragonfly brooch to make a gather around my midsection. After getting dolled up and putting on some jewelry and boots, I was ready to show off my new dress.
I was all dressed up and ready to hit the town. So, Cliff and I opted to go to dinner at Edwards Mill Bar & Grill.
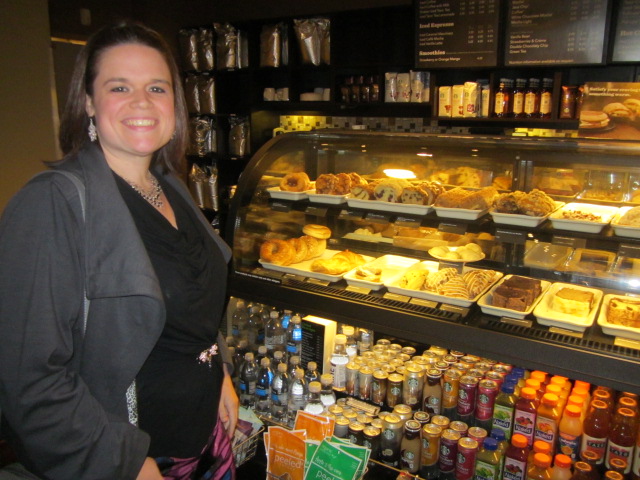
After a slightly disappointing meal, we stopped by Starbucks so I could get a skinny mocha. Luckily, I had the willpower to avoid getting a tasty-looking pastry from their display case.
I'm happy with how this dress turned out. I wasn't really sure it would work out, but I believe the dragonfly brooch saved it.
Saturday, January 19, 2013
Refashion: From Frump to Fab
I've got great news! I got a new sewing machine for Christmas, but I haven't yet had a chance to use it. I'm in the process of cleaning up my sewing area, so I'm not quite ready to sew my refashions. But I promised you all a refashion on Saturday, and a refashion you shall have.
Also, I highly recommend that to do this refashion, use a skirt with an elastic waistband. Otherwise, there could be some problems with it staying up.
Then after dinner, it was time to go bowling with a few friends.
This skirt just screams frump.
Since I didn't have a way to sew a refashion, here is a quick and easy no-sew option.
Now I feel fab!
I don't know if it's obvious, but all I did was raise the skirt up over my chest. Since it was an ankle-length skirt, it is still plenty long. I used a gray pashmina for a sash and donned my gray shrug to match the sash. By the way, I don't like going without a bra and slip, so the shrug was essential for this to work. Otherwise, it would have been quite the show for some people.
Also, I highly recommend that to do this refashion, use a skirt with an elastic waistband. Otherwise, there could be some problems with it staying up.
So, what's a girl to do with a cool new frock? Go out on the town of course. First there was dinner at a Mexican restaurant with Cliff.
Then after dinner, it was time to go bowling with a few friends.
Gotta love those shoes with this frock.
Monday, September 17, 2012
Refashion: From Hippy Chick to Fashion Chic
I've been quite fascinated by the concept of refashioning. I'm a big fan of Jillian, the refashionista. When I saw this refashion on her blog, I have just the skirt that would work for it.
I used to love this in college.
Following Sarah's instructions on her blog, I started out by pinning down each side of my skirt approximately 8 inches from the waist band. I took in each side by about 5.5 inches.
Pinning the hem.
Next, I cut 2 horizontal cuts on either side to make the arm holes.
One of my new sleeves.
Next, it's time to run it under my machine to create the seams down each side under the arm holes.
What's the problem here?
So, there I was trying to sew my seams. It's the first time I've touched my sewing machine in years. I somehow remembered how to thread the bobbin and the needle. Then, the moment I started to whir the machine, the top thread broke. I took out my soon-to-be dress to practice on a random piece of cloth.
Hello old dog toy turned practice sewing cloth
I tried many different ways of threading the machine, and each time I began my practice, the top thread would break. I read that breaking thread could be a result of the thread being too old. So, I put my project on hold and went to buy new thread. With new thread in the machine, I was optimistic it would work. Nope. My hopes were sinking for my project.
But I would not be deterred. I grabbed my thread, a needle and sat in a chair under a light. For 2.5 hours, I hand stitched those 2 long seams up each side of my would be dress. It took a long time backstitching every stitch, but I knew it would make me happy to finish this project.
Not as straight as a machine, but not bad.
Once I had each side sewed up, it was time to cut off all that excess fabric.
You're out of here!
I applied fray block to each of the sleeves to keep all those ravels from getting worse.
Ravel be gone
Last, but definitely not least, I gave each of my new seams a nice press with my iron on very low heat.
This is the first time I've touched an iron in seven years.
And presto, after donning one of Cliff's belts, I now have an interesting new frock to wear.
Ta da!
Subscribe to:
Posts (Atom)